About
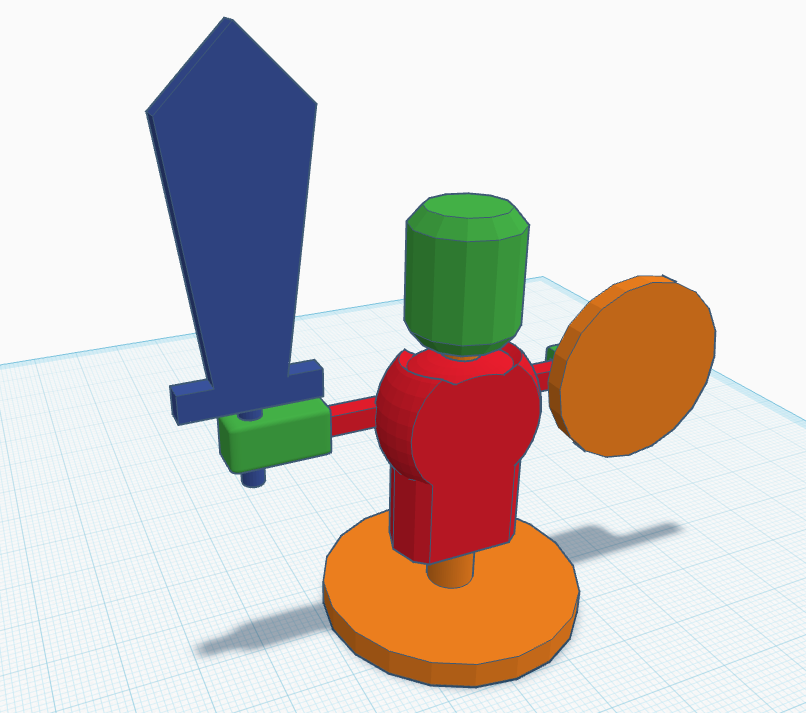
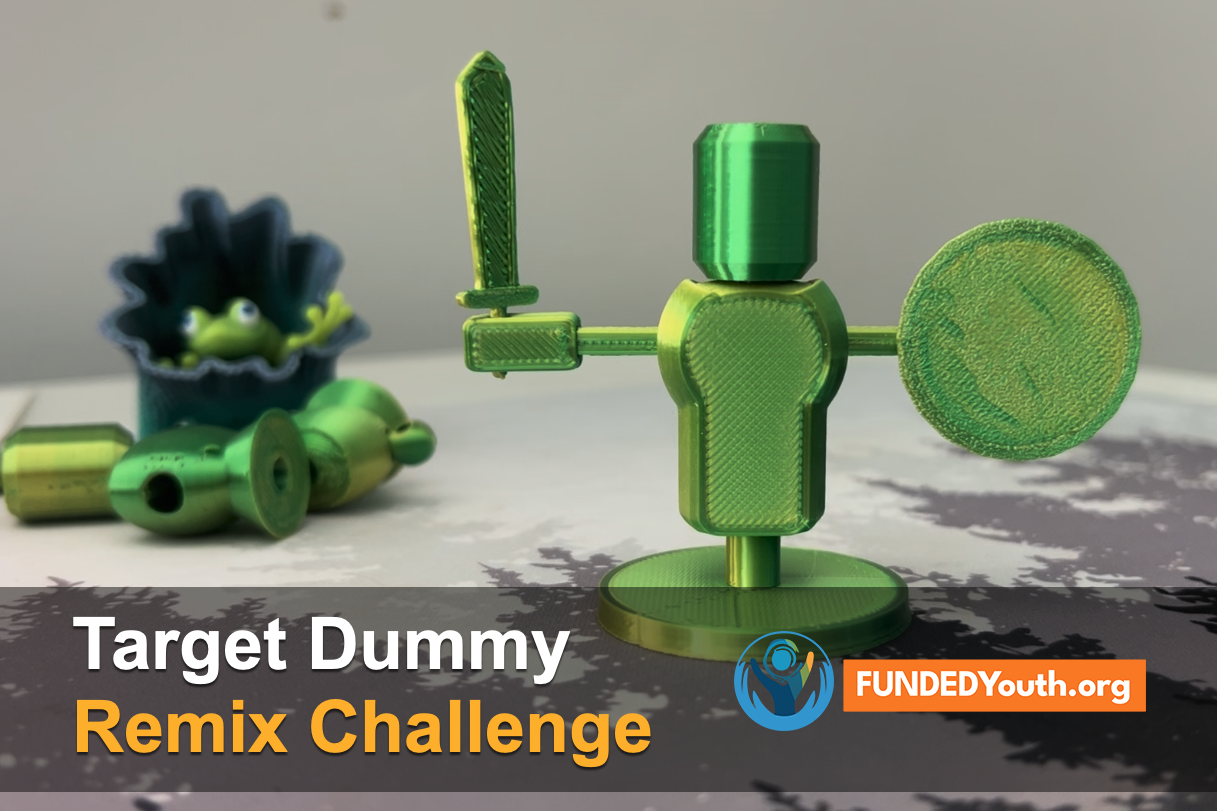
For this tutorial we will be making a Target Dummy using the TinkerCAD tool. We will print this a Sovol SV06 Plus 3D Printer. You are welcome to try this out first and then watch or read through how we did this.
Adapted from the 3D File TargetDummy2 by artist: InfityModels
Goal: To make this dummy spin and break apart when hit with enough force.
Watch on YouTube
https://www.youtube.com/watch?v=B0cwV9C5Uro
Step-by-step Tutorial
- Create a new project in TinkerCAD.com called Target Dummy
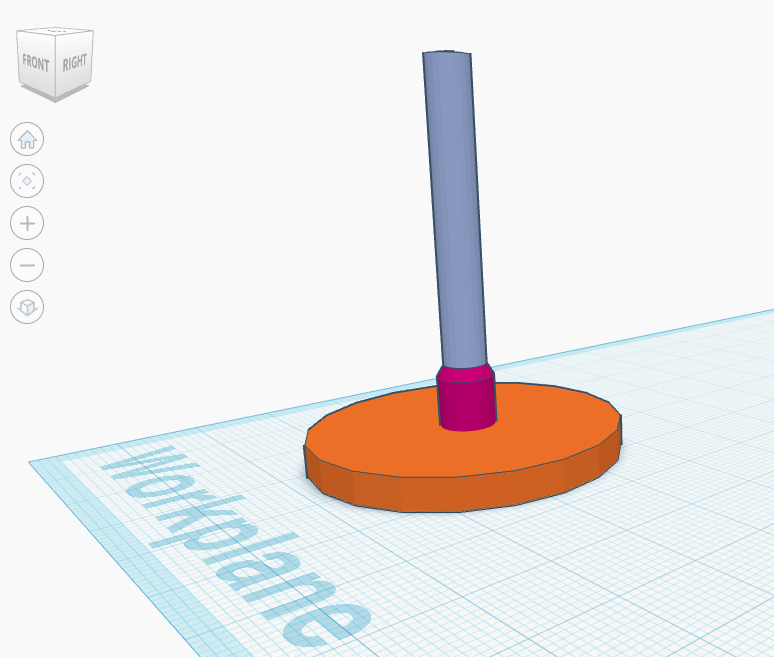
- Let’s create the Base Post
-
Add three (3) cylinders to the workplane.
-
Cylinder 1 (Dimensions)
- Width and Length:
40 mm x 40 mm - Height:
4 mm
- Width and Length:
-
Cylinder 2 (Dimensions)
- Width and Length:
7 mm x 7 mm - Height:
12 mm - Sides:
64 - Bevel:
2.5
- Width and Length:
-
Cylinder 3 (Dimensions)
- Width and Length:
5.25 mm x 5.25 mm - Height:
50 mm
- Width and Length:
-
Align all three to center and bottom
-
Now let’s create the Head
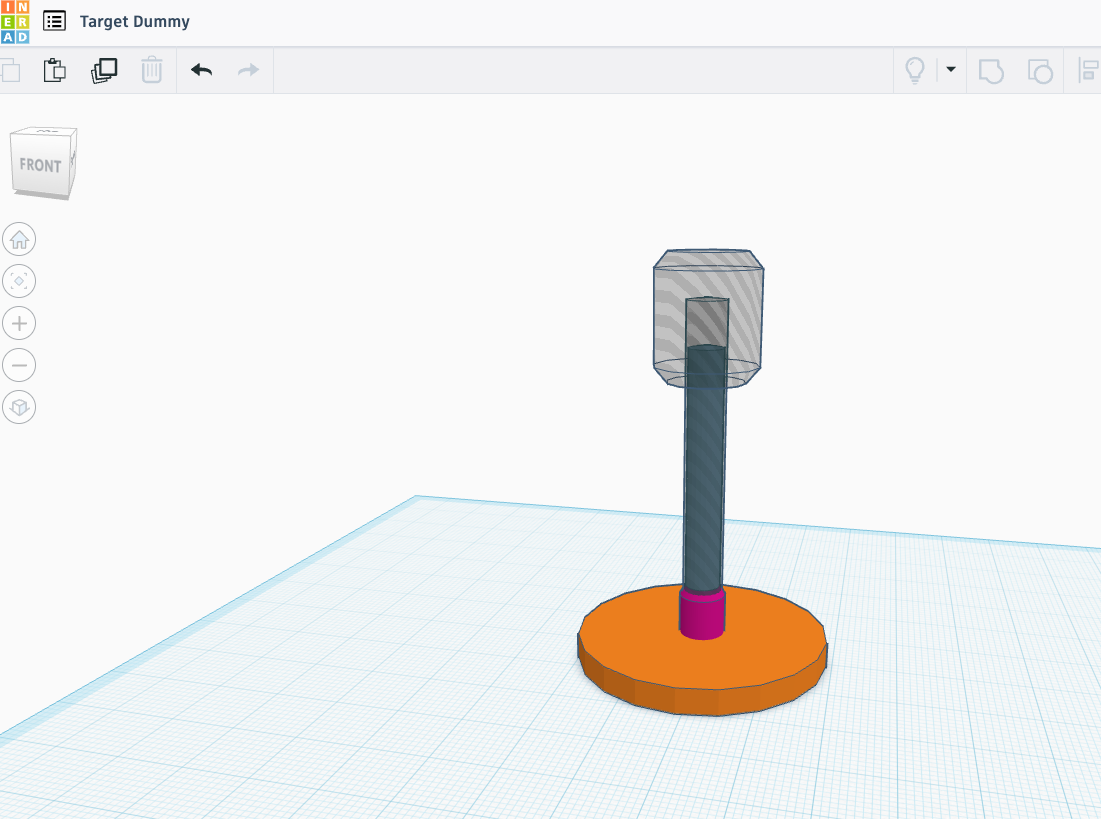
- Duplicate the tall center cylinder ctrl + D (Win) or cmd + D (Mac)
- For this new cylinder convert it to a Hole and set its (dimensions) to:
- Width and Length:
6 mm x 6 mm - Height:
57 mm
- Let’s create the Head. Duplicate the
Hole style cylinderand set its (dimensions) to:
- Width and Length:
16 mm x 16 mm - Height:
19 mm - Sides:
12 - Bevel:
2.5 - Segments:
1
-
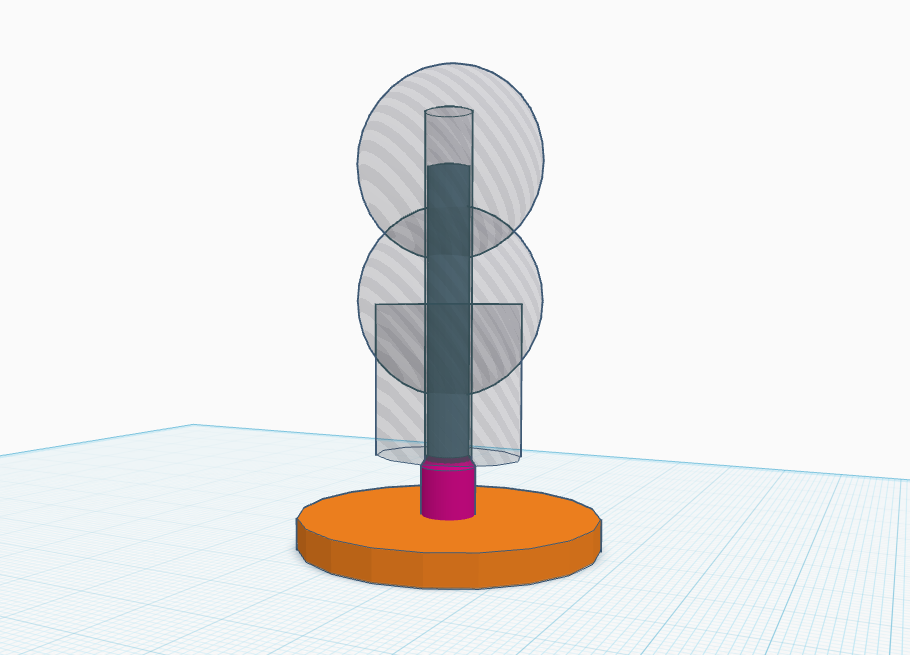
Make sure the Head is aligned to the center of X and Y for the Base Post. Move the Head
verticallyto45 mmand change the Head to aHoleso you can see through it for now. -
Next, we’ll start on the Body
-
To build the body we need multiple shapes. We will start with lower part. As seen in the picture the Head is hidden. So select the
Headand thenclick the lightbulbon thedrop-down settingsto hide it. -
Duplicatethelong cylinderin the middle that isHoledand hide the duplicate. This will be used later. -
Duplicatethelong cylinderin the middle again. This time let’s change its (dimensions)
- Length:
20 mm - Width:
16 mm - Height:
20 mm
-
Move this
new resized cylindervertically up to12 mmoff theworkplane. Just above thesmall cylinderwe created when building the Base Post. Thesmall cylinderacts as stopper for the dummy body. -
From the Shapes Panel drag in a
sphereon to the workplane -
Make sure this new
sphereiscenteredto thebase unit. Set its (dimensions) to:
- Length:
25 mm - Width:
20 mm - Height:
25 mm
-
Move it so it is vertically
20 mmoff the workplane. Almost centered with the cylinder. -
Duplicate this cylinderand drag the duplicate upwards so it is38 mmoff the workplane. -
Now that we have our three shapes. Convert the
bottom cylinderandmiddle spheretosolid. Then group the two solids and thetop hole cylinderto form a body. -
Chest and Shoulders
-
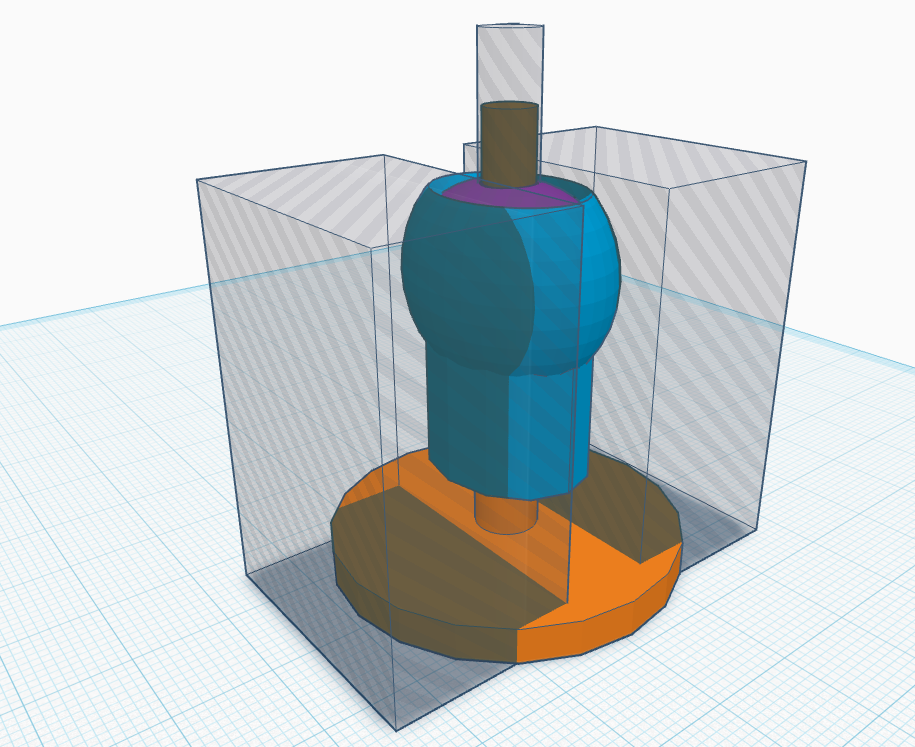
Take a look at the image above. You can see the new body we’ve created. Plus three new shapes. In the middle of the body we’ve added a neck/shoulder looking area and two
holedblocks on either side. This will give ourdummya front and back. -
From the
shapes paneladd anew cylinderand make sure it iscenteredto thebase post. Then set its (dimensions) to:
- Length:
20 mm - Width:
16 mm - Height:
11 mm - Workplane Z-Height:
32 mm
-
Group this
new cylinderwith thebody object. -
Add a
Boxto the workplane. Set the (dimensions), make it ahole, and make sure it isaligned to the centerof thebase post. -
Duplicate it in placeandmovethe duplicate to thebackof thedummyby-15 mm. Thenmove the original boxto thefrontof thedummyby15 mm. -
Group the current bodywith thetwo holded boxesto give thedummya flat front and back. This will make it look like the dummy hasshoulder pads.
- Arms - From the
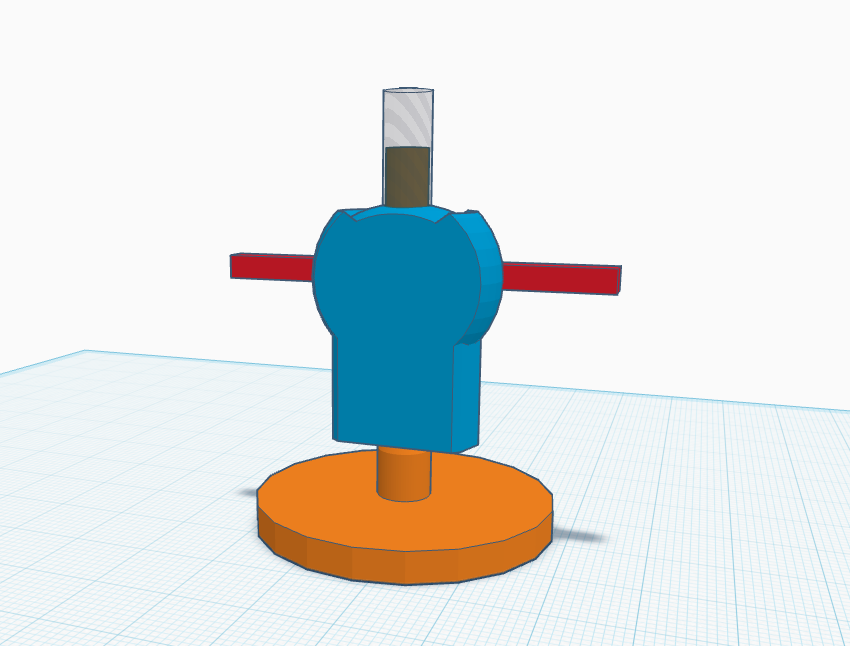
shapes paneladd in asolid boxand set it’s dimensions to:
- Length:
53 mm - Width:
3 mm - Height:
3 mm - Workplane Z-Height:
33 mmor to the center of the upper body.
- Then
alignthe block to theback of the body
You might think the next step is to group the arms to the body. But not yet and you’ll see why.
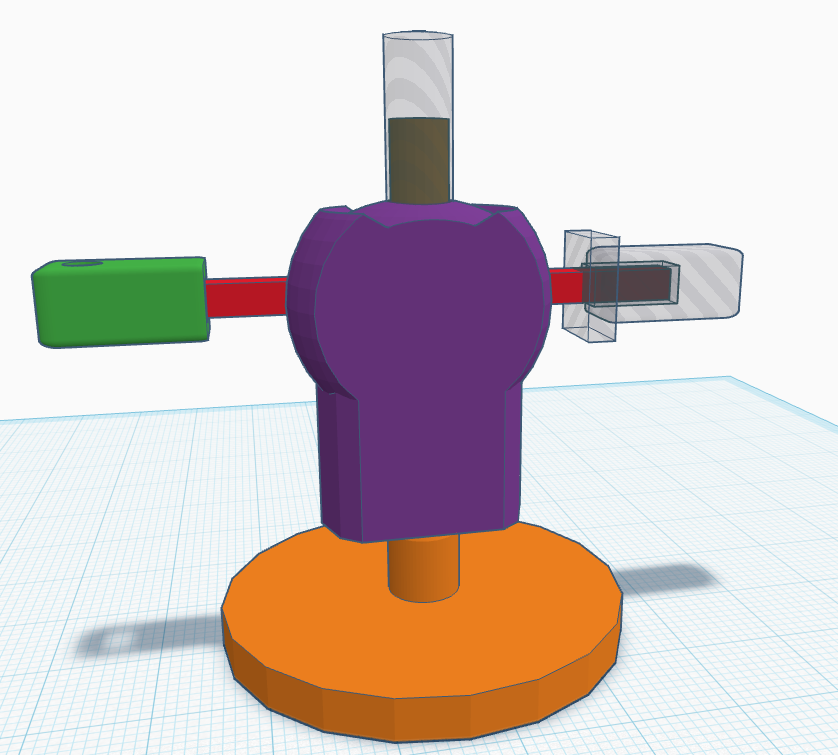
- Hands - We’re going to design hands that can be printed separately and slide onto the arms. Plus they will be able to hold items like a sword and sheild.
- To build the hand.
Drag a boxfrom theshapes panelonto the workplane. Set its (dimensions) to:
- Length:
15 mm - Width:
6 mm - Height:
7 mm - Radius:
2
-
Alignthis new block to the right side of thearmblock and thecenter. Then make it aholefor now. -
Now move the block so that it is about half-way off of the arm block as show in the picture. We want the hand to be able to hold a sword.
Like putting a hole through it. -
Duplicate the
armblock, make it ahole, and set it’s dimensions to:
- Length:
8 mm - Width:
3 mm - Height:
11 mm
-
Move it over the inside of the
hand blockas shown in the picture. We’re going to use this make the inside of thehand blockflat. -
Make the hand block solid, then group the
hand blockand theholed blockwe just created. The hand block should now be flat on the inside toward the body. -
Convert the
new handback into aholedobject -
Duplicate the arm blockand set its (dimensions) to:
- Width:
3.75 mm - Height:
3.75 mm
-
Convert it to a
Holeand thencenteritto the main arm. Then shrink it down to about:9 mm(length) as shown in the image. -
Align it to the end of the arm and move it
3.75 mmout or scale it out into the hand. -
Convert the
hand blockto a solid and group theHole arm blockwithhand blockto create a cutout inside the hand. This will allow us to print the hand and slide it onto the dummy.
Why make the hands separate? Making them separate lets us add custom piecs by just modify the hands without modifying the arms.
- Complete the body
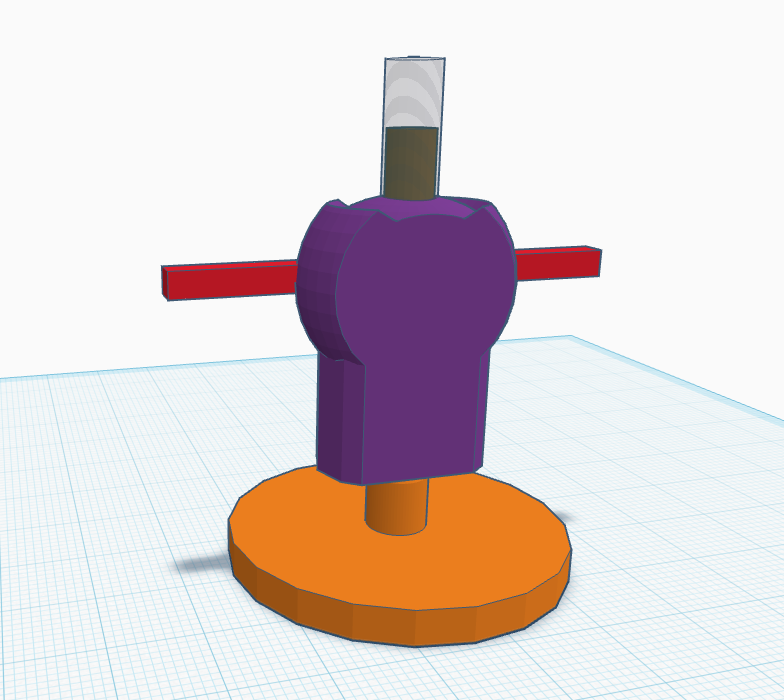
-
In the image above I’ve hidden the hands temporarily.
Groupthearm blockand thebody block -
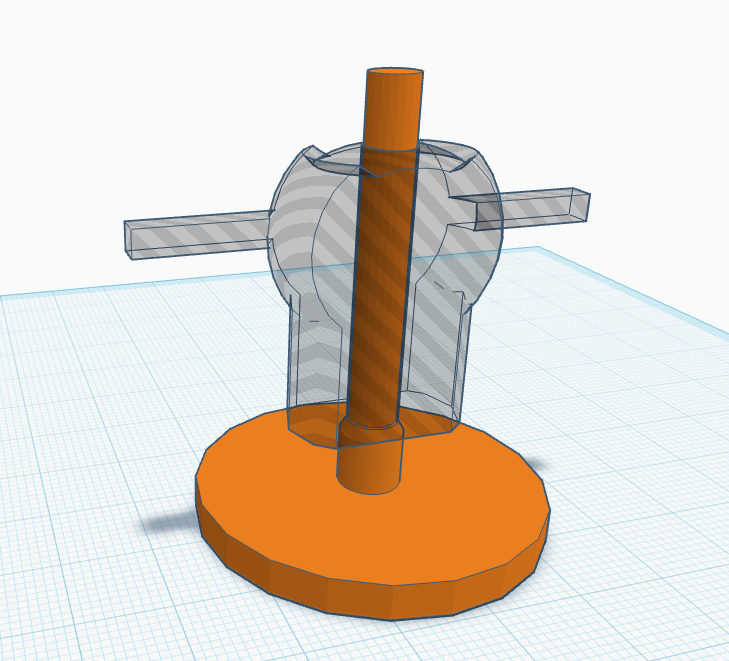
Then group the
new body blockwith theHolepost sticking up through the body. This will cut out hole in the body allowing the body to spin on the base post.
- Another Hand and a Shield
Technically you don’t have to mirror the and place it on to the other arm in Tinkercad but we do it for the asthetics… because it makes it look cool!
-
To make another hand. Simply duplicate the existing hand, convert it to a
hole, reflect it, and move it until it looks like it’s on the other arm end with some space. -
Add a
new cylinderfrom theshapes panelandalignit to theleft hand center-end. Then move it in a bit towards the body.
I find it easier to make the hand a
Holeduring this process because it makes it easier to see the spacing. An then to make the cylinder aSolid
- Set the
new cylinder(dimensions) to:
- Width:
3.5 mm - Legth:
3.5 mm - Height:
12 mm
- Make the the
new cylinderisextendedabove and belowtheleft-hand.
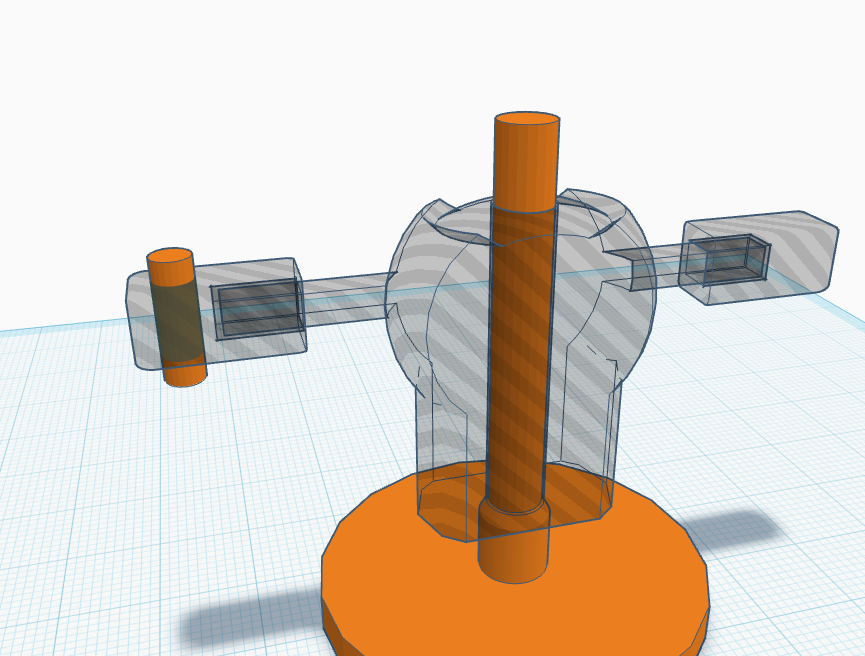
-
Then
switchthenew cylinderfrom solid toholeand theswitchthe hand tosolidand group the two. This will give you a hand with a hole for something to hold. -
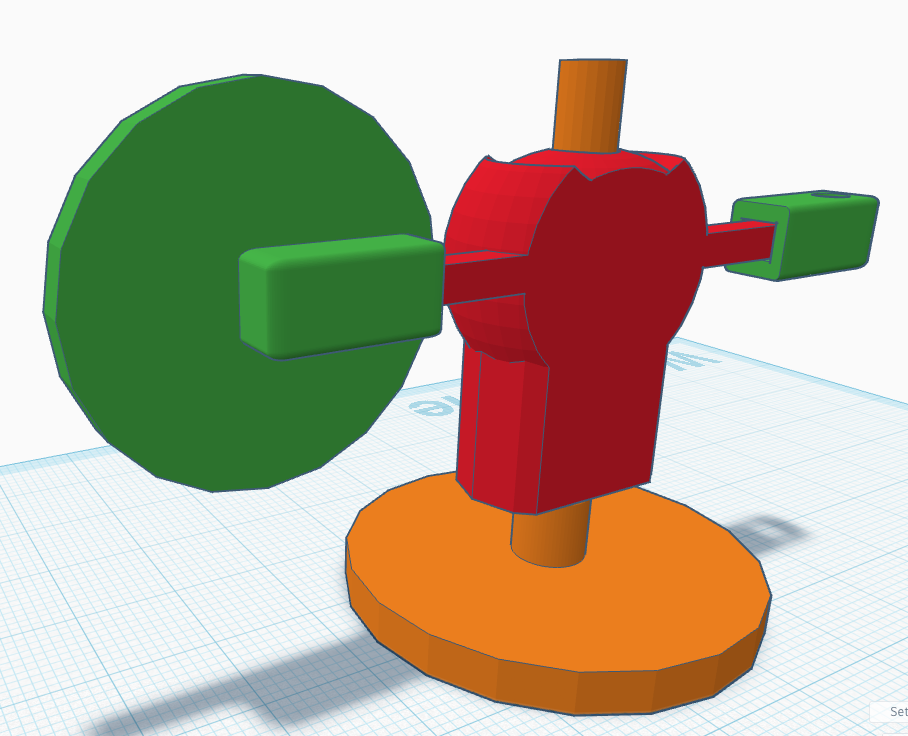
To create the shield… all we have to do is drag in a
new cylinderfrom theshapes paneland set its (dimensions) to:
- Length:
30 mm - Width:
3 mm - Height:
30 mm
- Then moave the
new cylinder shieldin front on theright hand. Try and get the end of the hand to be in thecenter of the shield. Thengroupthehandand theshieldfor a customshield handto print.
- Back to the Head
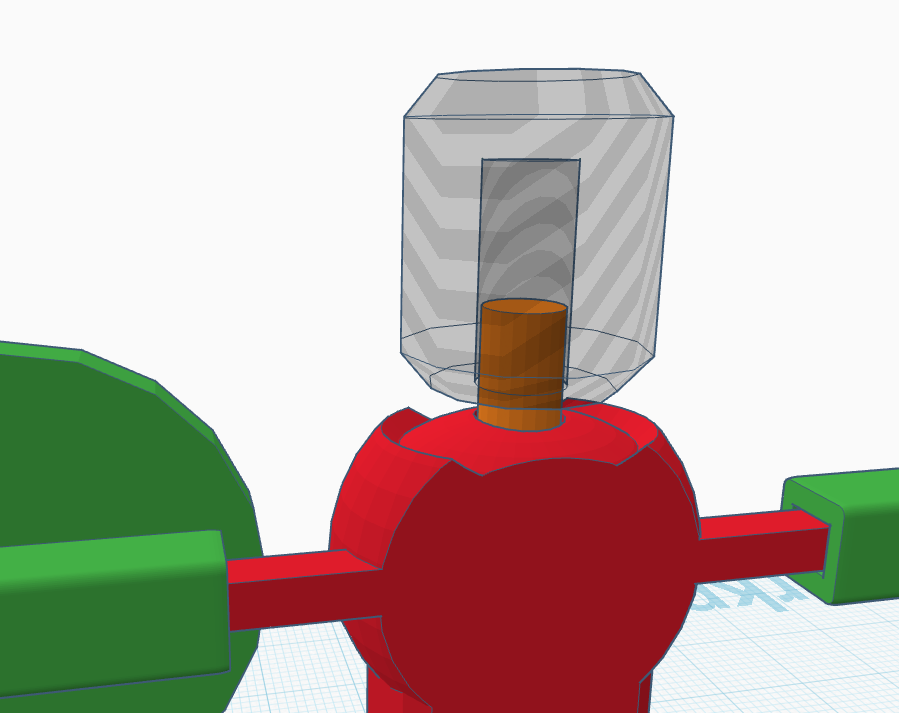
Before we build the sword lets give our dummy a head.
Unhidetheheadand theduplicate cylinderwe hid at the beginning. Make sure thelong cylinderis aHoleand theheadis aSolid.Groupthem together.
-
Conver the head back into a solid.
-
Making the Sword
-
Either
hidethedummyor move it out of the way. -
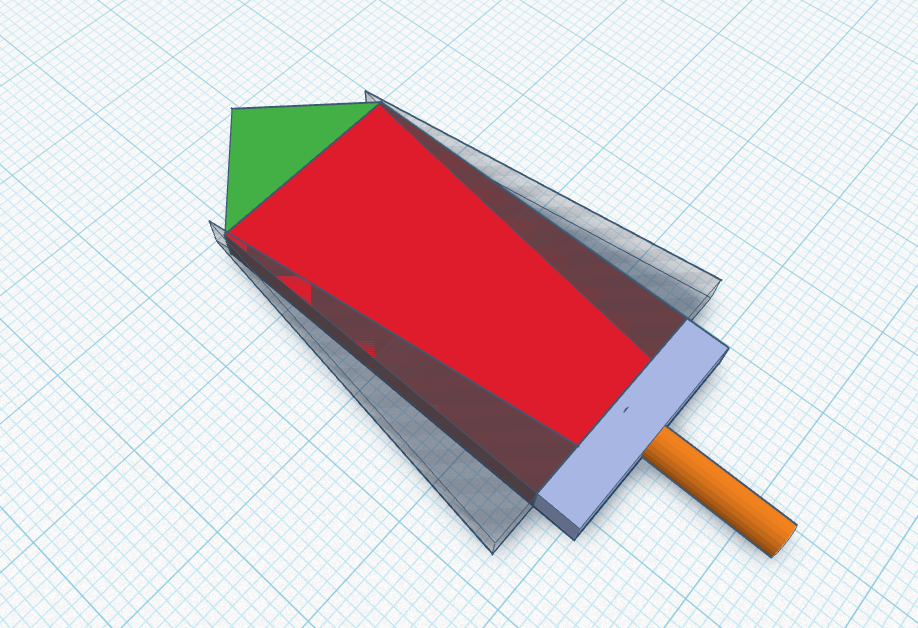
Add a
new Boxfrom theshapes paneland set its (dimensions) to:
- Length:
35 mm - Width:
20 mm - Height:
3 mm
Duplicatethe box, give it another color (not required), set its (dimensions) to:
- Length:
4 mm - Width:
20 mm - Height:
3 mm
-
Movetheduplicate box4 mmdown below the original shown in the image above. -
AddaRoof blockfrom theshapes panelto theworkplaneand set its (dimensions) to:
- Length:
10 mm - Width:
20 mm - Height:
3 mm
-
Alignit to thecenterof themain boxand thenmoveitto the topjust above themain boxas shown in the image. -
AddanotherRoof blockfrom theshapes panelto theworkplaneand set its (dimensions) to:
- Length:
37 mm - Width:
20 mm - Height:
3 mm
-
Convertthis to aHoleandalign this shape'scenter to theleft-sideof themain blockas shown in the image. -
Duplicatethis shape after the alignment and move the copy to the other side as shown in the picture. -
Addanew Cylinderfrom theshapes panelto theworkplaneand set its (dimensions) to:
- Length:
15mm` - Width:
3 mm - Height:
3 mm
-
Alignit to thetop-centerof thebottom Box -
Group all items to make a sword. This can be printed and inserted into the Dummies hand with a hole.
